
Include function
The Include function allows you to include categories and items from a master project into new projects. With this feature you can sync product information and changes made to the master-project to new projects without having to adjust the information manually.
How does it work?
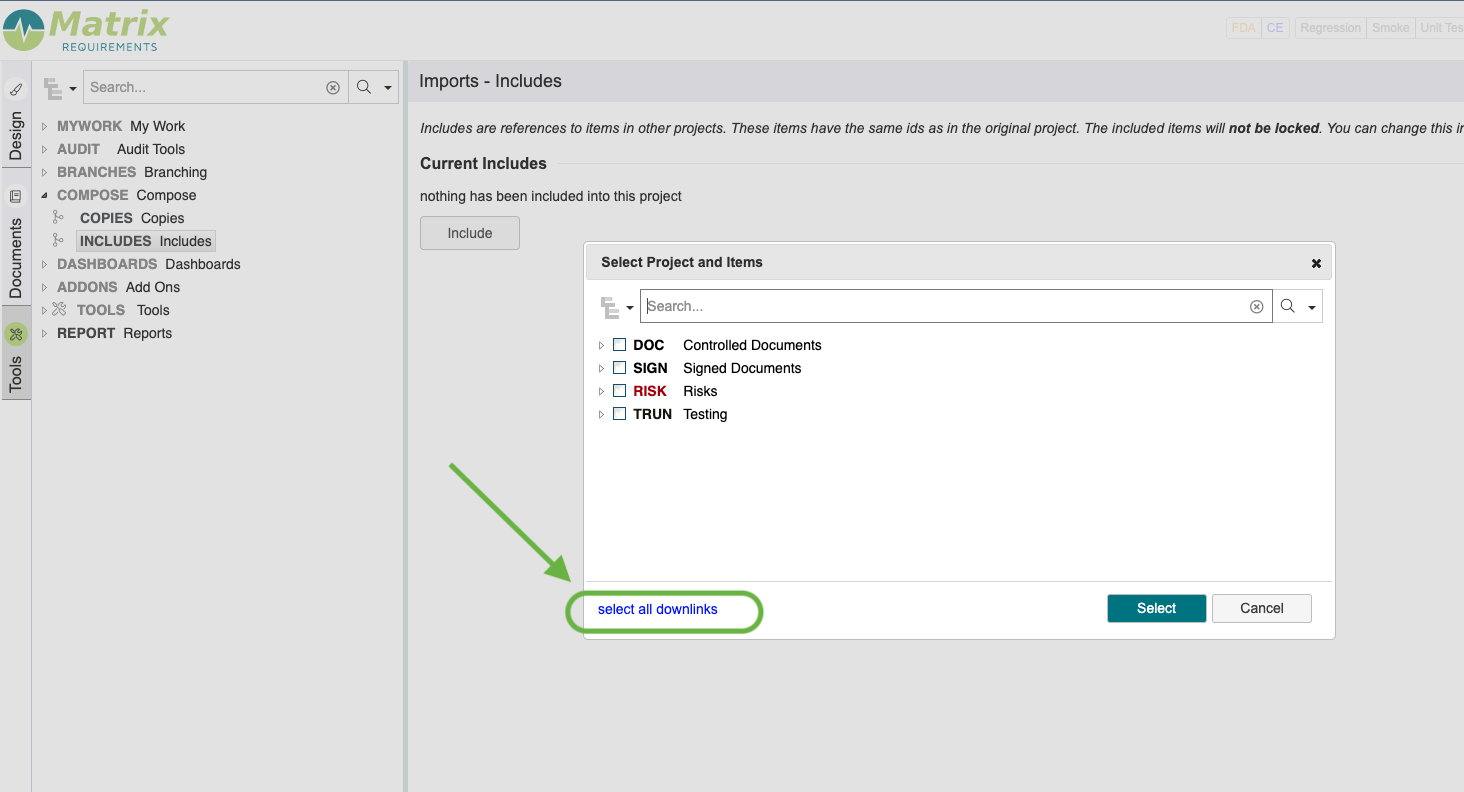
What items to include from the Master project can be managed from the Include Dashboard, which can be found in the Tools section:
Note: This only works, when the categories and item fields exist in both projects. If a category doesn’t exist or fields have different names or are not set up, information will not be synced.

Here you can specify what project to use as a Master project and which items specifically should be included. We recommend including all downlinks which exist in the Master / source project. This ensures proper traceability. They can easily be included during the initial setup. Simply choose: “select all downlinks” in the selection menu. This will automatically include all items that are linked to the initially selected items.
Once you have synced all items from the Master project, the same item ids will be shared to the items in the source project and they will be placed in a folder with the title "Included from SOURCE PROJECT".
Furthermore, the new items will appear directly in that folder or have their parent folder structure copied over, depending on whether you’ve checked Preserve source project folder structure in the Compose Settings.
You will be able to tell them apart from items that are specific to the target project through this icon:
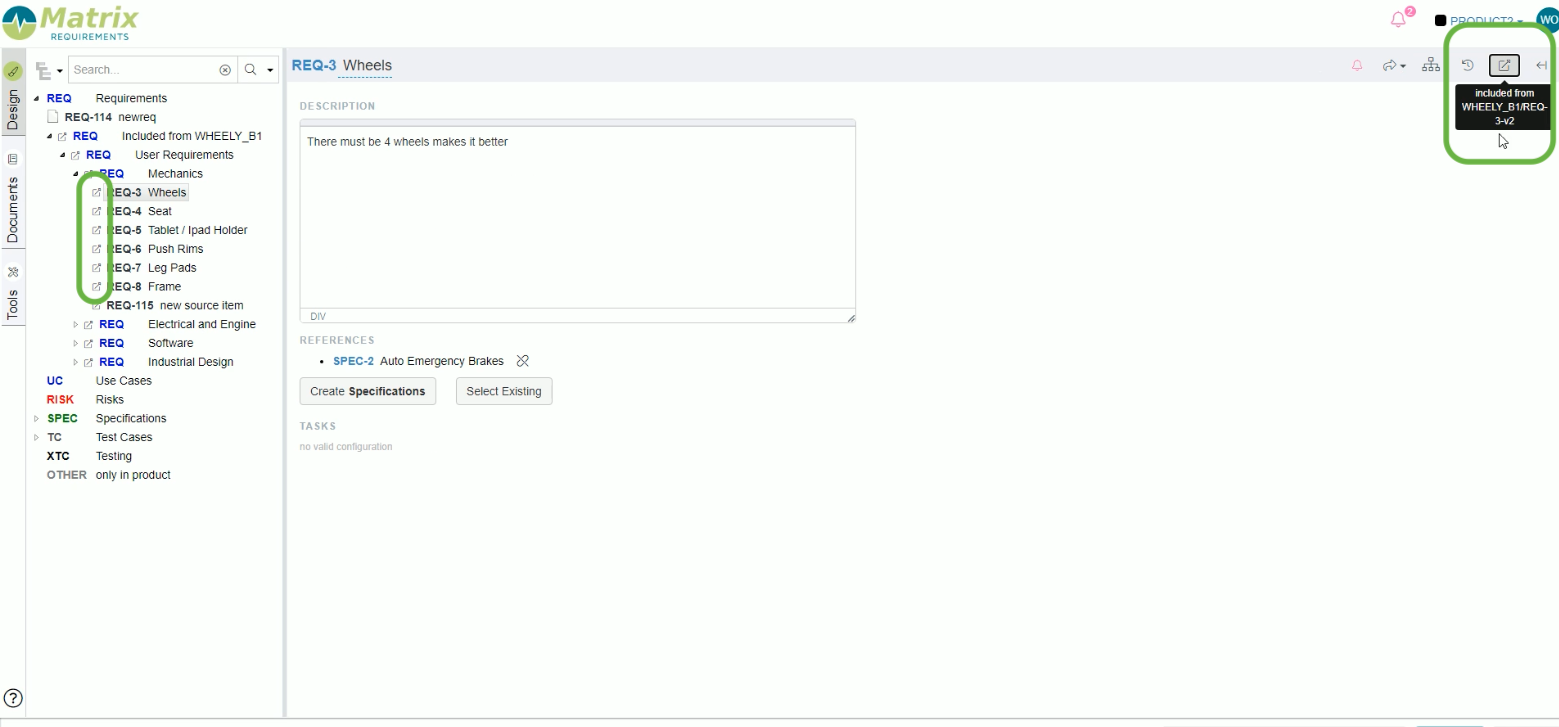
In the item tree it highlights visually which items are not native to the project.
In the upper right corner it provides additional information about the version when you hover over it. It tells you what version of the source / master project this item was based on. By clicking the icon you will be forwarded to the source item.
Additionally, if you preview an included item with the preview function: It will also be visible that the item was included from a Master project:

To manage included items, you need to navigate back to the Tools Tab → Include. In the include Dashboard you now have the following options:
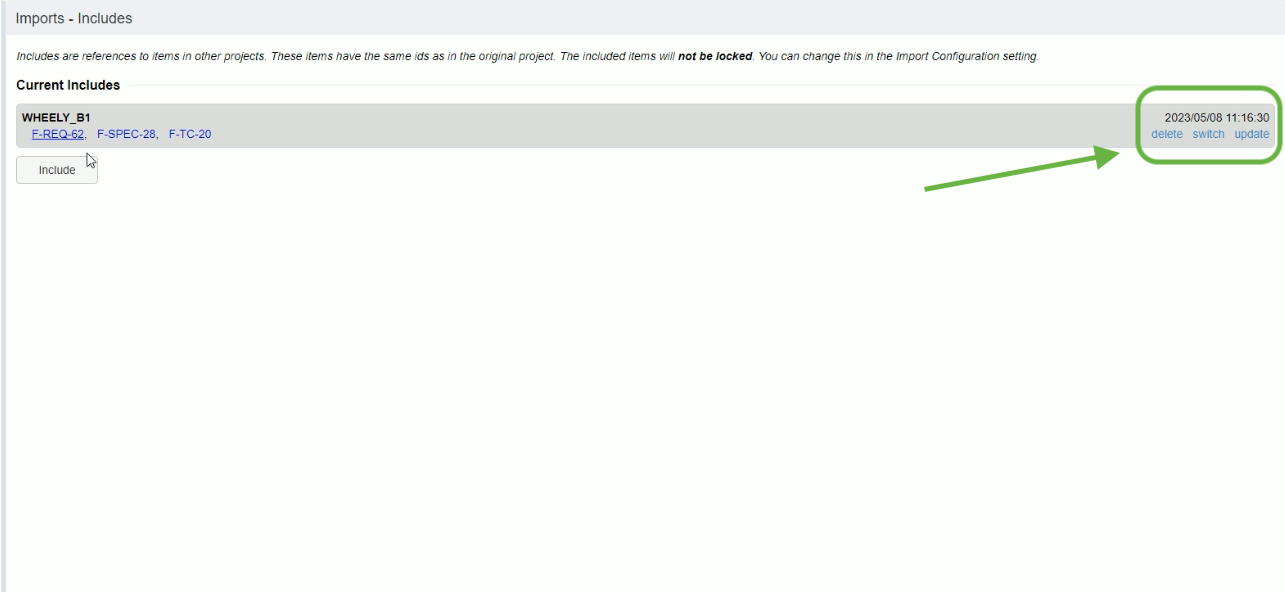
delete: this function removes all items you have included before. So all items synced from the Master project will be removed.
switch: with this you can switch between Master projects. It’s essential that all items synced are included in the new Master / source project. So this is useful if you have different branches of a project for example. Note that if you switch the source project, the ItemRef will change, since the source project name is part of the ItemRef. Instead of REQ-3-C1, you’ll have REQ-3-C2, for example. Traces will be unaffected. If an uplink or downlink pointed to REQ-3-C1, it will continue to point to REQ-3-C2.
update: with this you can update the items in the target project to the latest version of the Master project. So if you made changes to the Master items, that you want to sync to the other projects you’ve shared them too, you can easily do so with this function.
Note: Information only syncs one way. We recommend making updates and edits to the Master item if you want to keep them synced. If you edit the new or target project and sync your items with the Master project, those changes will be lost. The Master project will overwrite changes in the target project when you sync them.
When you update a project, the menu will look as follows. It will highlight all items that will be updated during the sync.
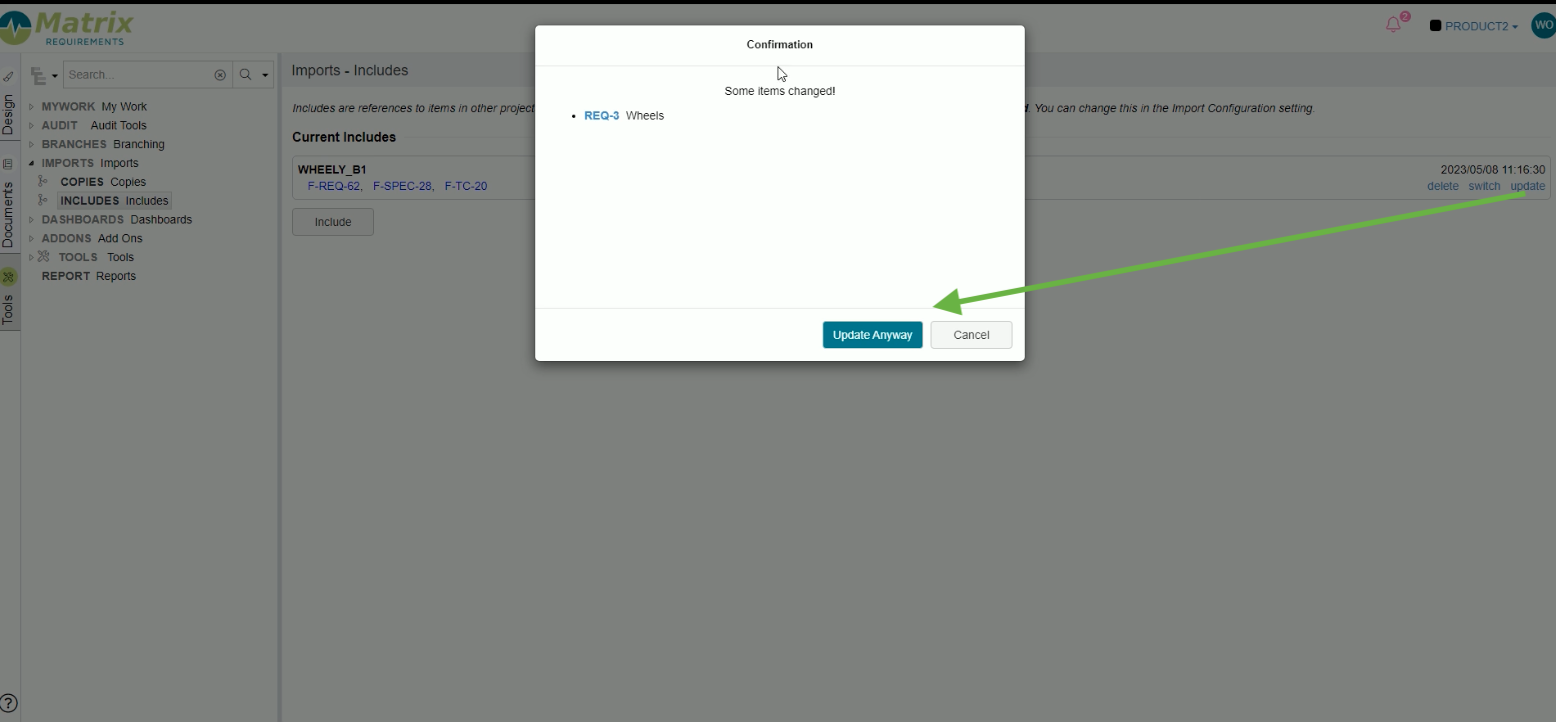
If you want to add further items from the Master project this is also done through the update function.
How to lock included items
As included items only sync one way, we recommend not editing included items in the target projects. Because of this certain features are disabled by default. These include Drag&Drop function, which means it is not possible to move the include root into another folder as well as item deletion of included items or folders that contain Include items
The general editing of Include items is not disabled, therefore to avoid changes being made, you can use a lock label to prevent others from editing.
To set this up you’ll need to navigate to the Server Administration → Projects → “Target project” → Project settings → Labels.
Here you need to create an OR label, which you could name “included” as an example. How to create an OR label is outlined here: https://docs23.matrixreq.com/usv23/or-labels
The next step would then be to navigate to Server Administration → Projects → “Target project” → Project settings → Locks
Setting up a Lock Label is explained here: https://docs23.matrixreq.com/usv23/locks
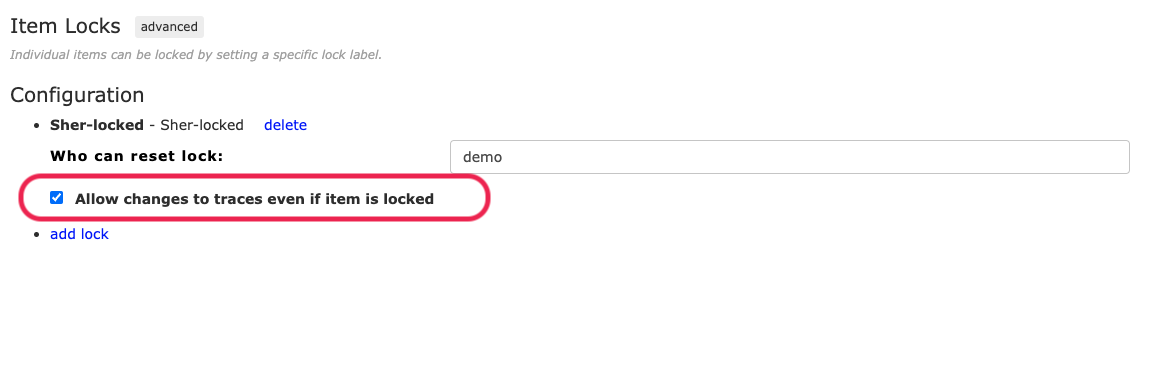
In this case there is a small difference in the settings. The Compose Module adds another setting to the Locks settings. “Allow changes to traces even if item is locked”
This setting allows you to keep the traceability up to date even though the item itself is locked.
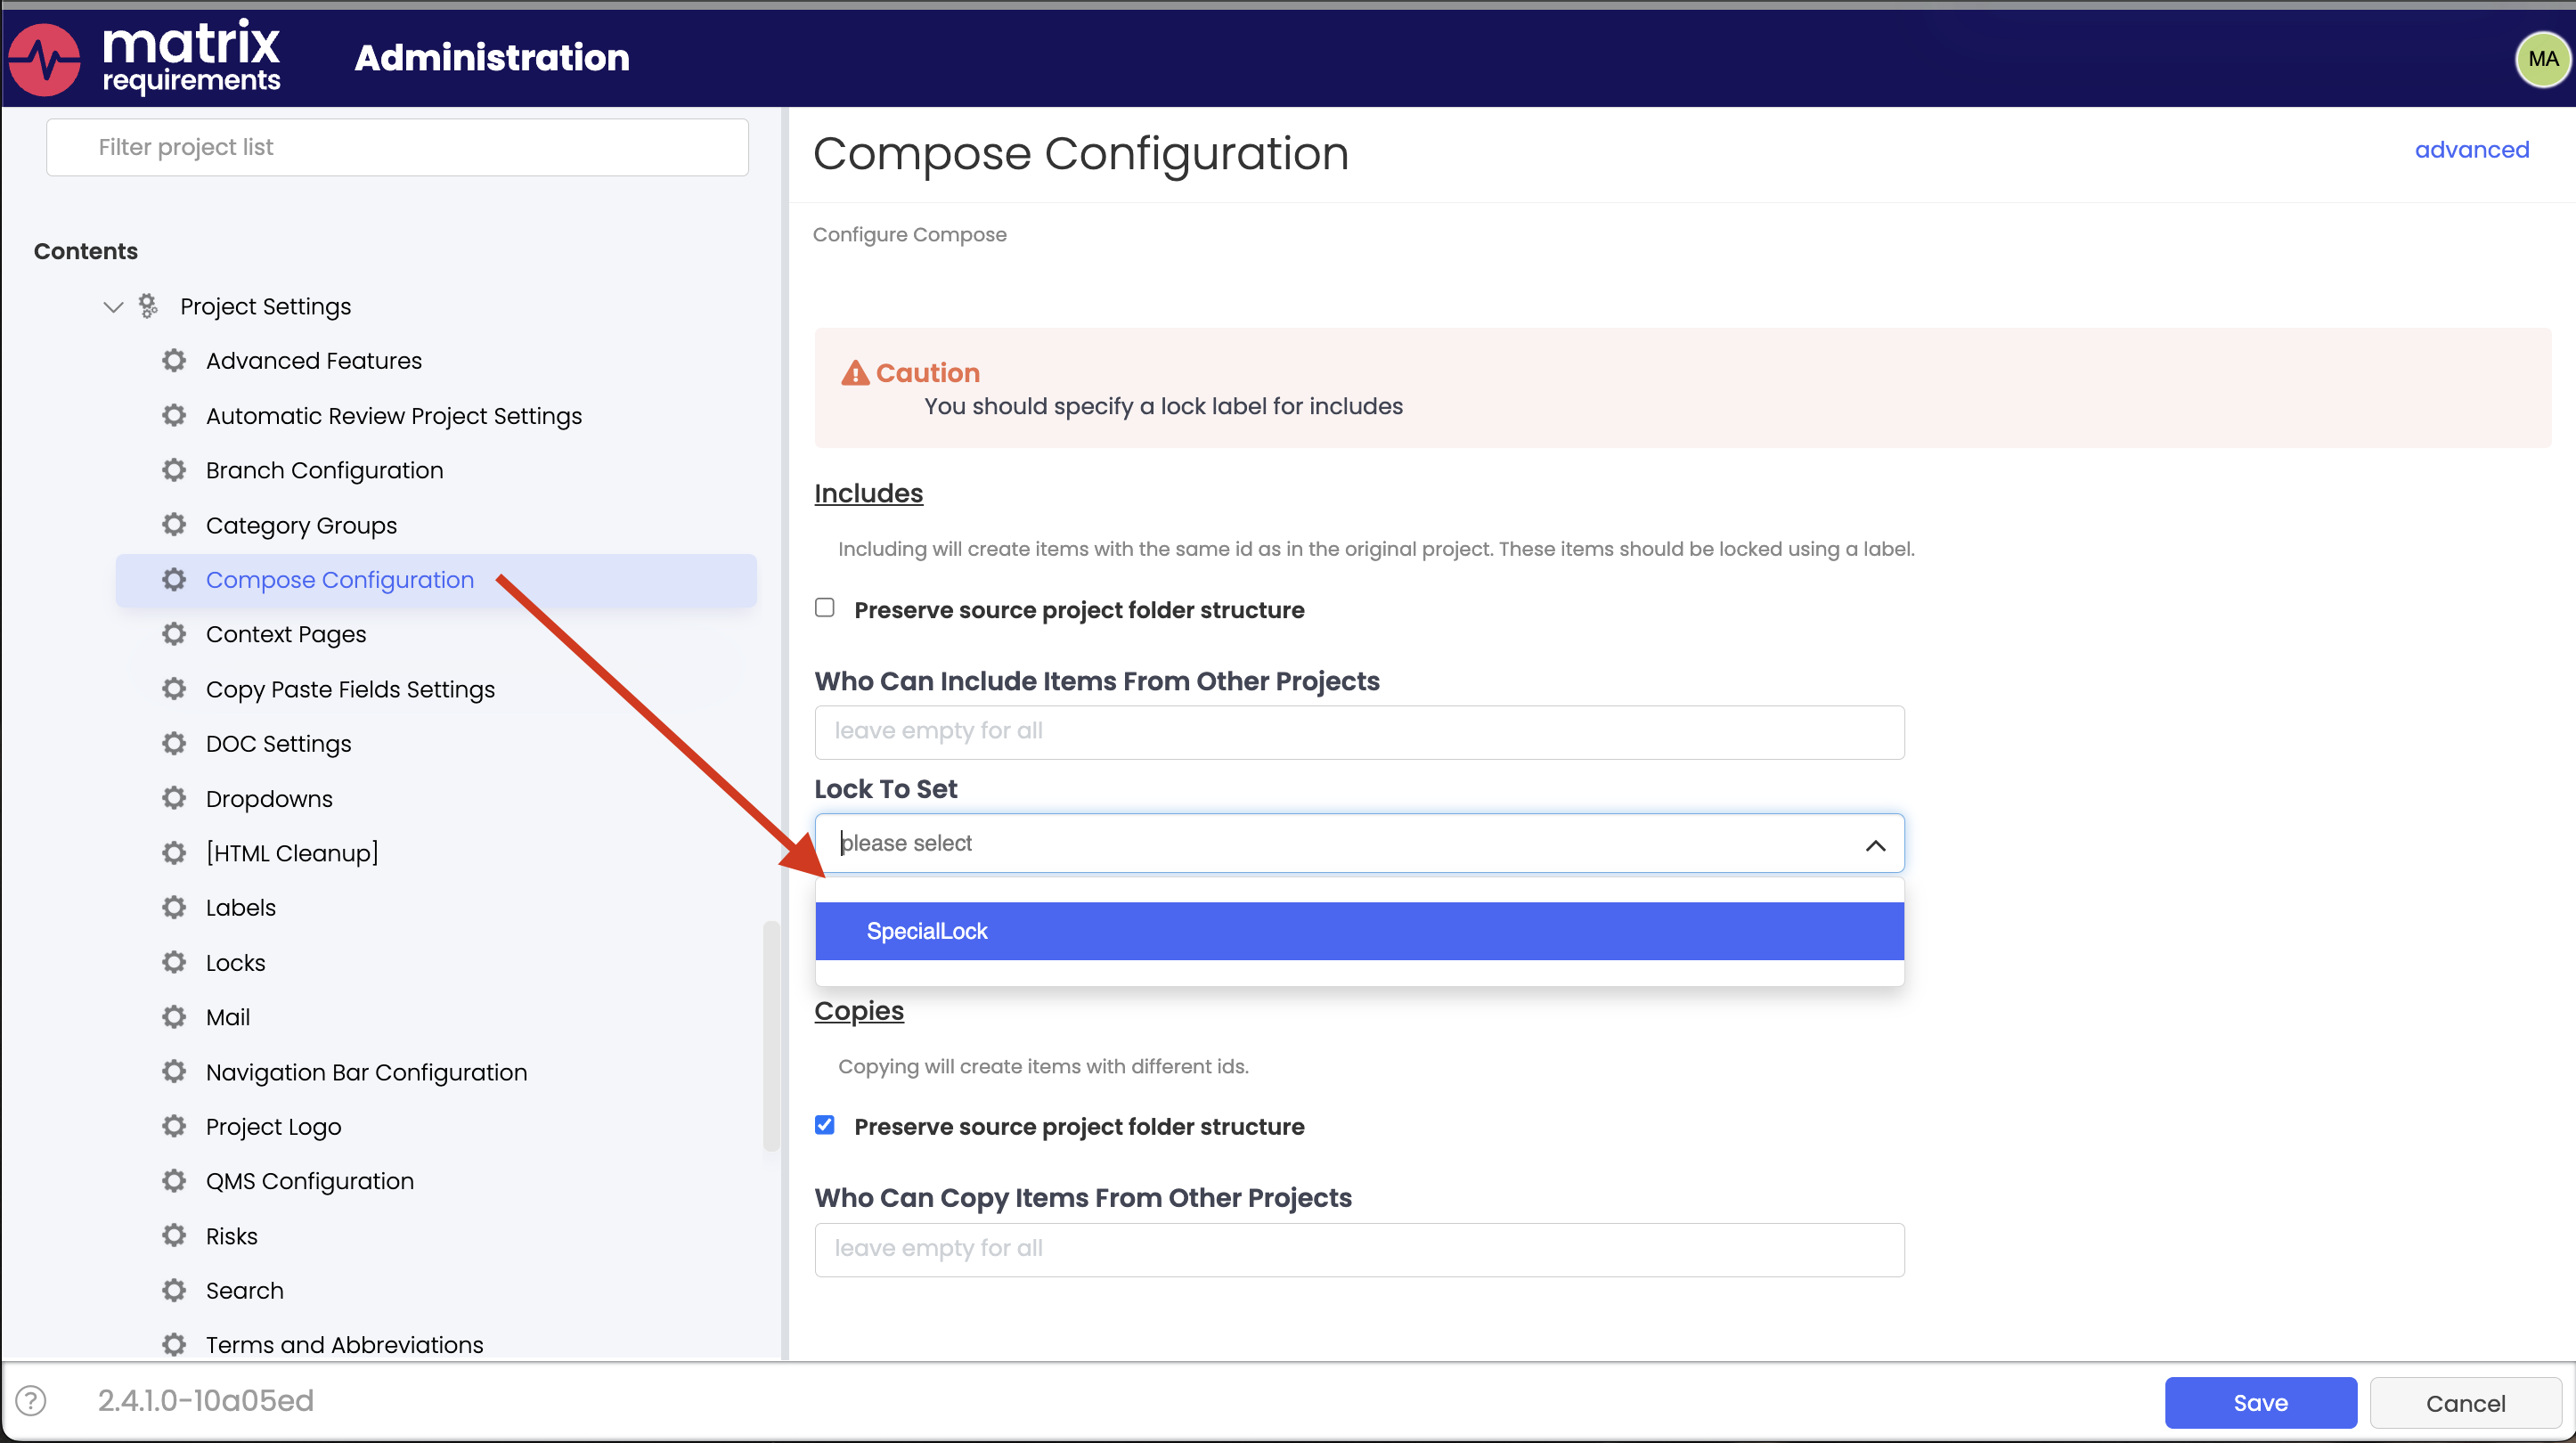
If you want this label to be automatically set when including items you can enable the function in the Admin settings again. To do this navigate the following path: Server Administration → Projects → “Target project” → Project settings → Compose Configuration
The option “lock to set” allows you to activate the label for all items that are included by selecting the include option:
Admin settings for Include
The include function can be further customised in the Admin settings.
Server Administration → Projects → “Target project” → Project settings → Compose Configuration
In the Import Configuration of the target projects you can specify the following settings for the include function:
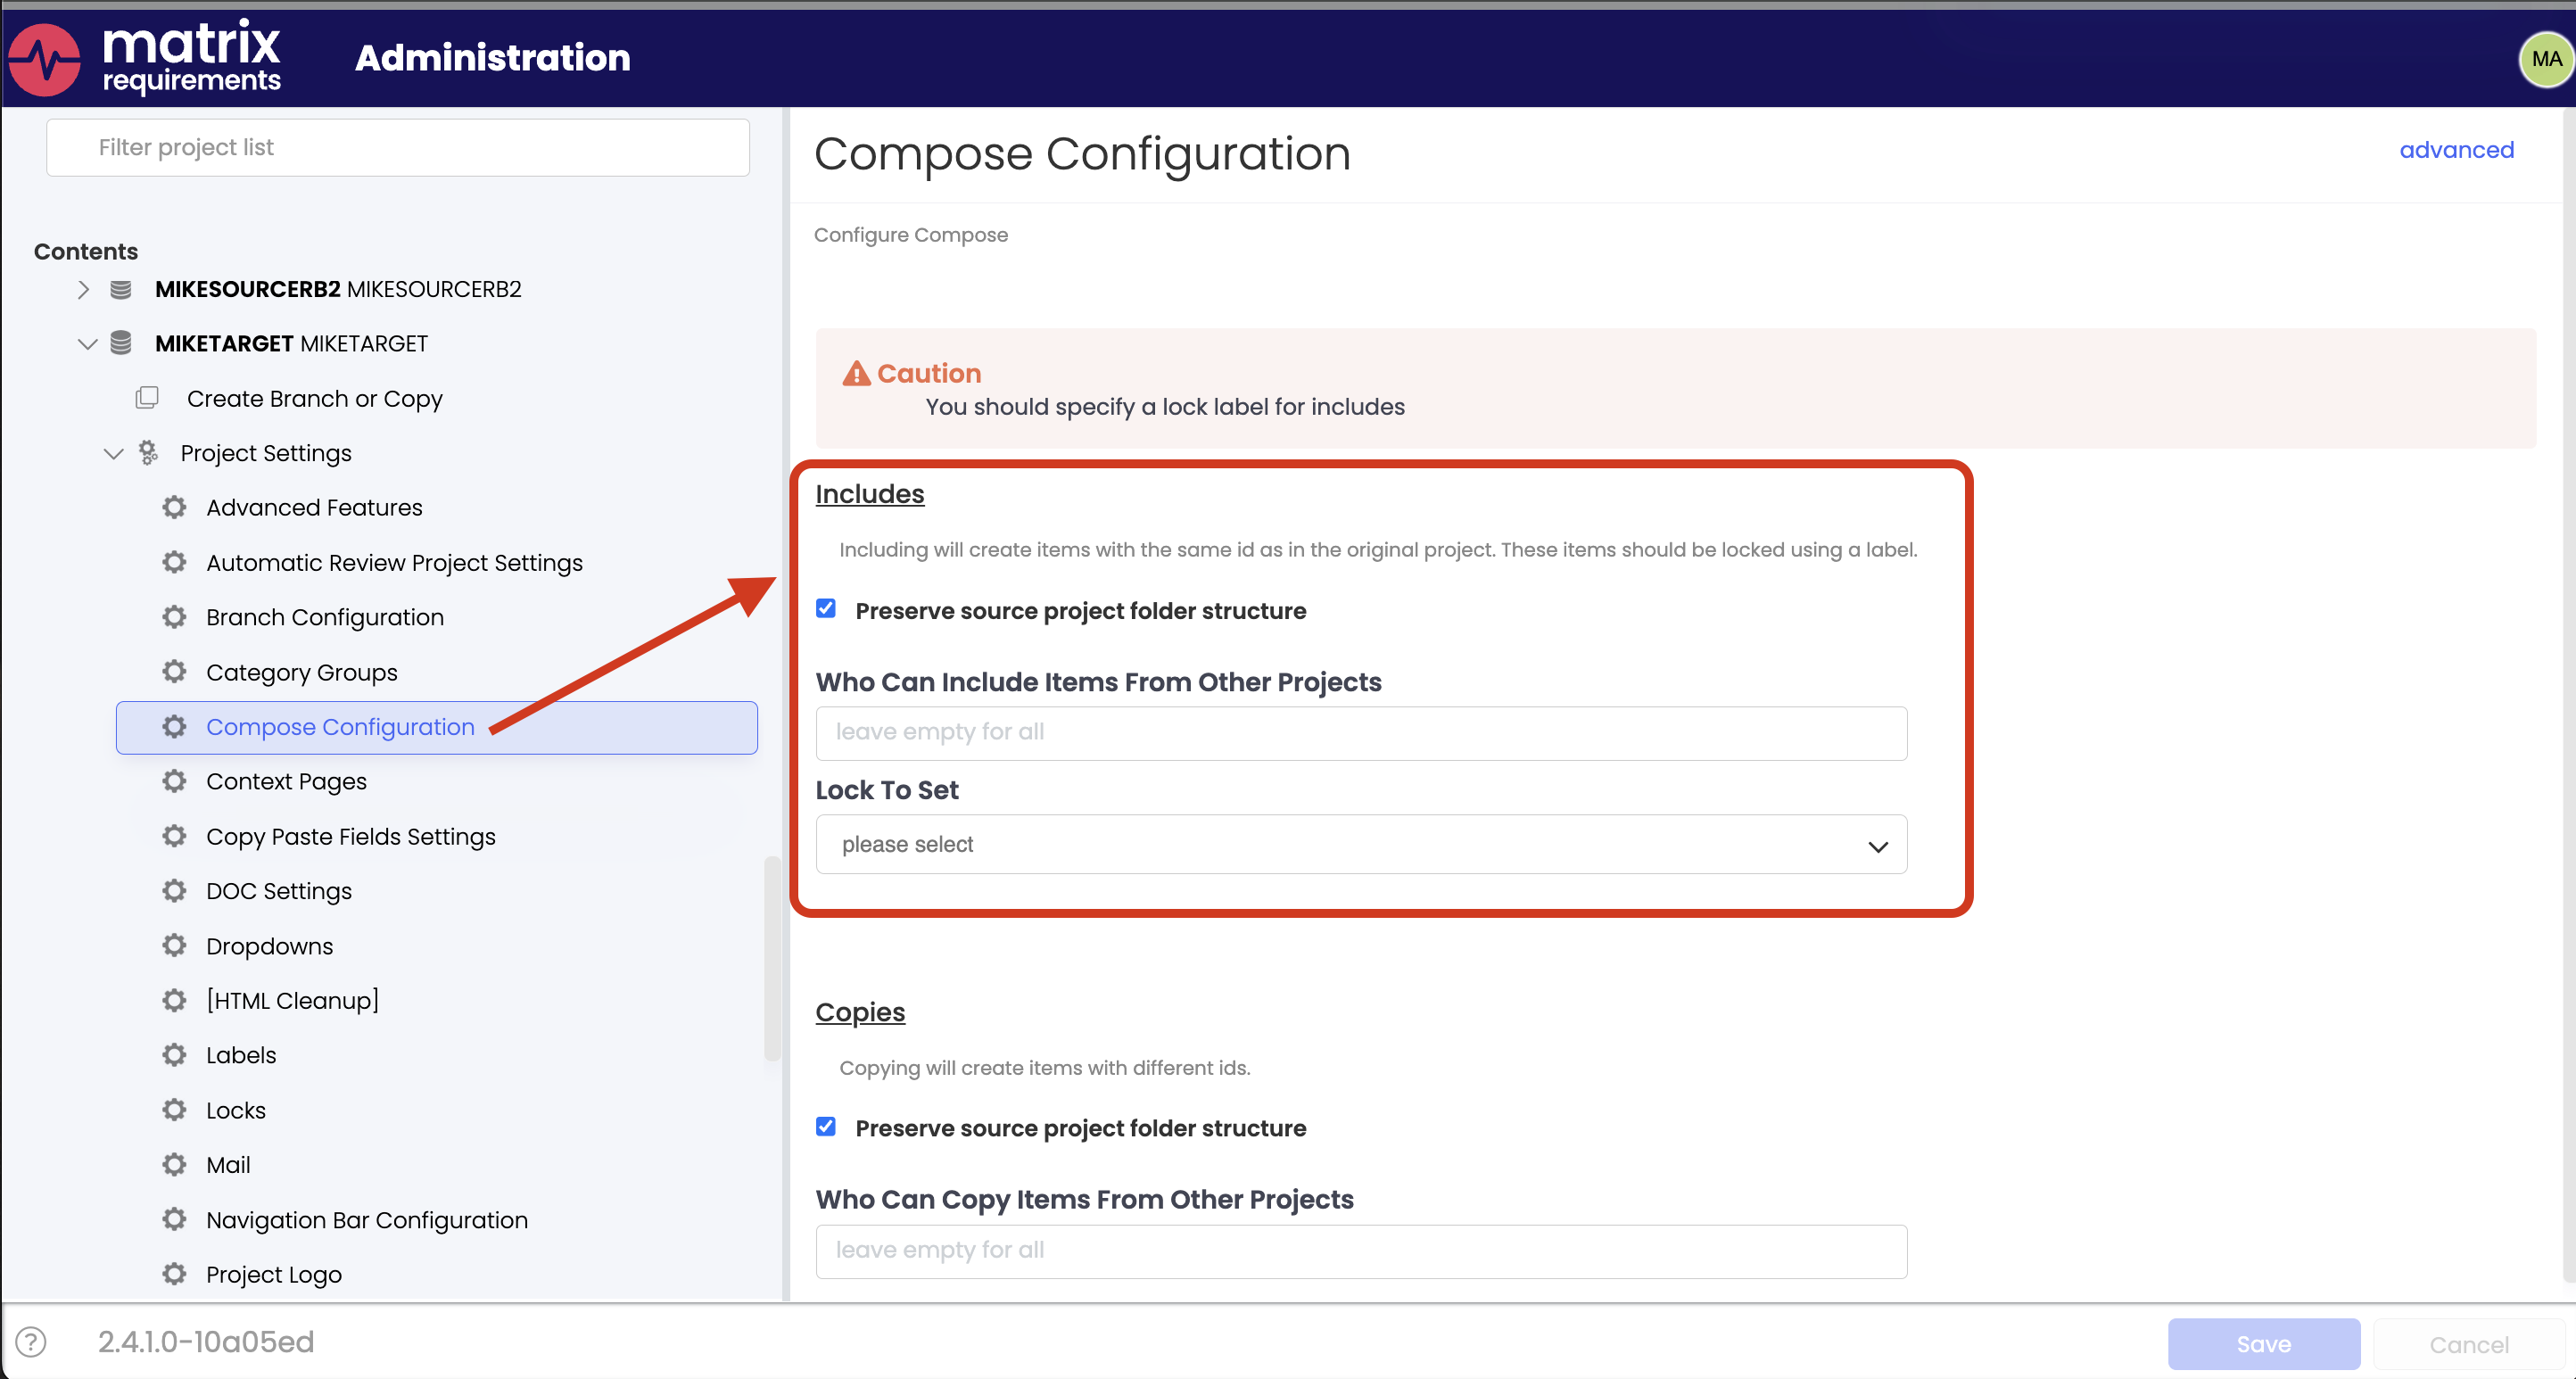
Preserve source project folder structure: Specify if you want included items to come in with their parent folder structure present or not. By default this is unchecked. In that case, if you included the folder Requirements/User Requirements/UI Requirements, it would appear directly under the include root folder like Included from <SOURCE PROJECT>/UI Requirements. If you do check this option, the included folder would appear under Included from <SOURCE PROJECT>/User Requirements/UI Requirements.
Who can include items from other projects: Specify who has the rights to use the include function in this project.
Lock set: Set a Lock Label automatically when items are synced through the Include function.
Each included project persists parent folder structure setting
An important aspect of the parent folder structure setting for an Include is that it cannot be changed. In the screenshot below, we see two included projects. One preserves parent folder structure, as indicated by the text “preserves folder structure.” The other does not.
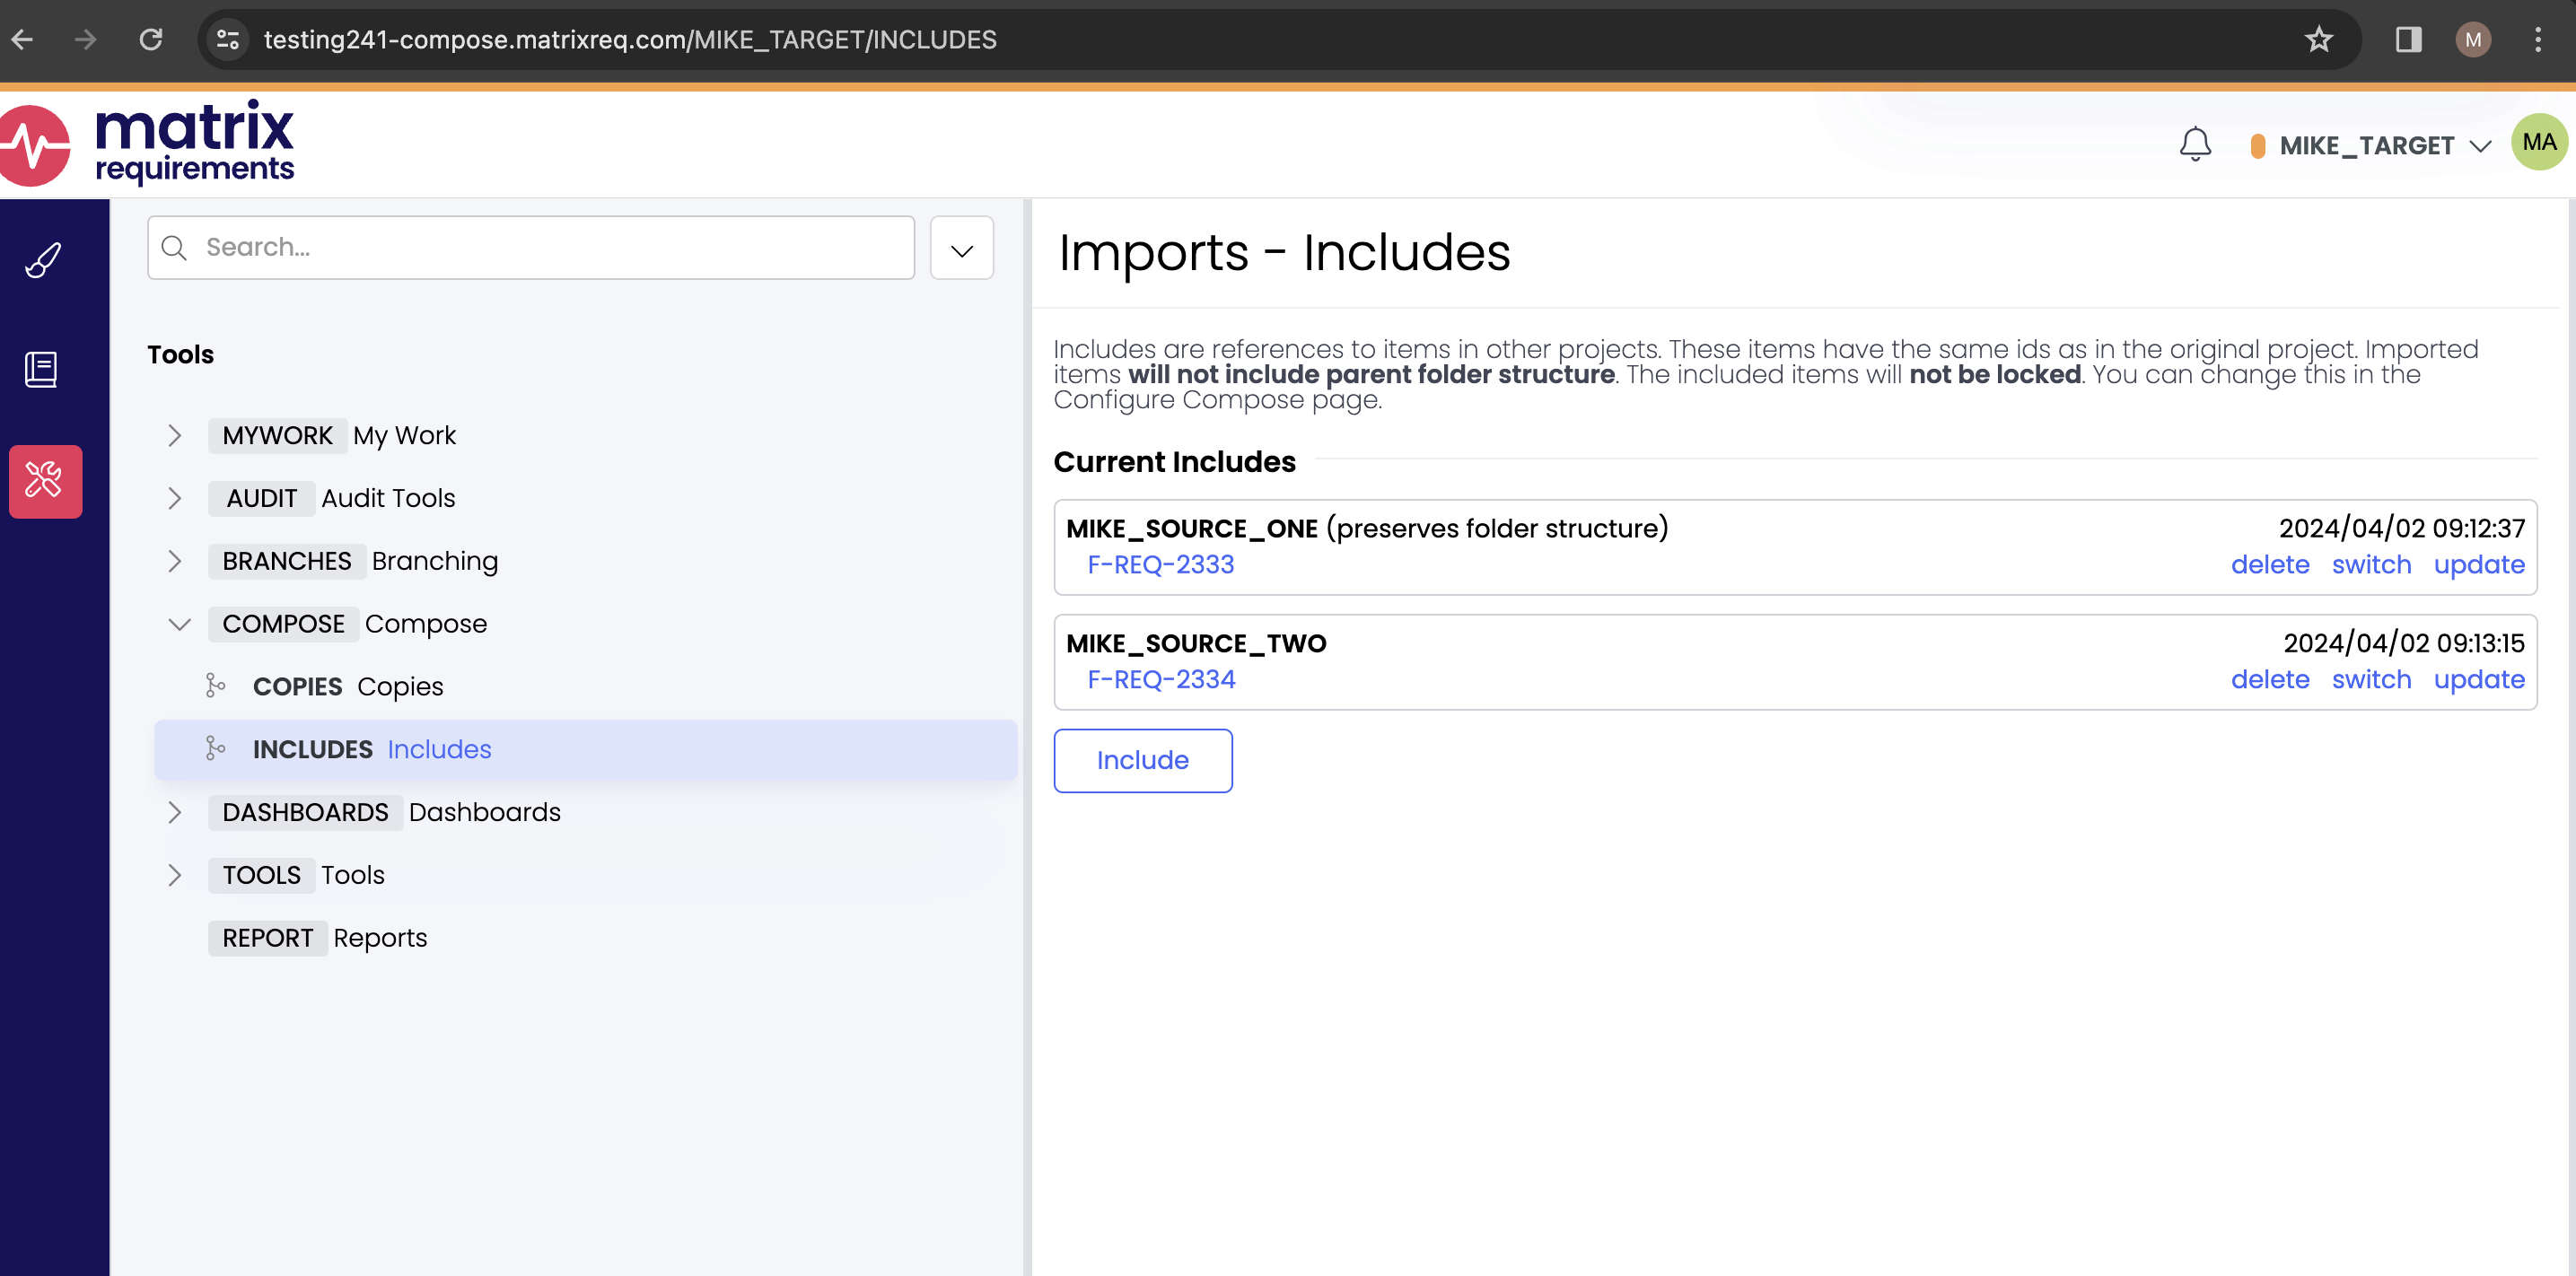
Using the “update” or “switch” buttons in the Include box for MIKE_SOURCE_ONE will not change the folder structure mode. Likewise, using the “update” or “switch” button for MIKE_SOURCE_TWO will not change the folder structure mode.
If you want to stop preserving parent folder structure for your Include for MIKE_SOURCE_ONE, you would have to “delete” the Include and create it again, this time making sure that the checkbox “Preserves source project folder structure” is off in the Compose Configuration panel before creating the Include.