
Automatic review - Admin instructions
After installing the Plugin through the Marketplace follow the below instructions to configure it tailored to your custom needs in the Admin section.
First navigate to project settings of the project where you’d like to enable this feature. In the settings you can now define per project for which categories the plugin should be enabled.
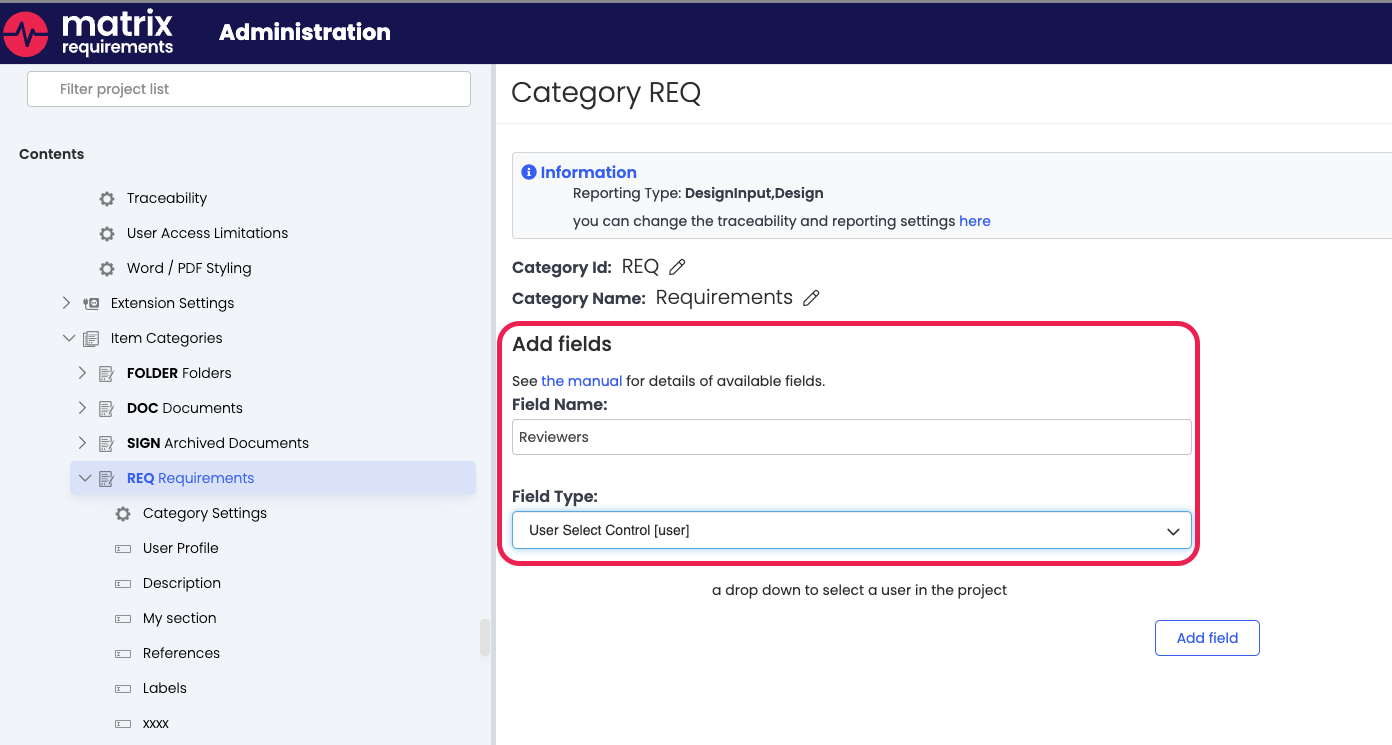
To do so you need to define categories for which you want to create the Review items first. Once you’ve set the categories, you need to navigate to said categories and add the field “User Select Control [user]”, and name it “Reviewers” to each category.
Once the categories have been modified the next step would be to align on a review category that is to be used. The most commonly used one’s are either REVIEW or AUDIT items but that can be configured based on your workflow.
Optionally you can add another layer of filter selection by including labels in the selection as well. So in the automatic selection and creation of Review items you can further select based on the fact of a label is set or not. This is a useful case for example in the QMS setup, as you can bulk create a review only for items which have no process review label set.
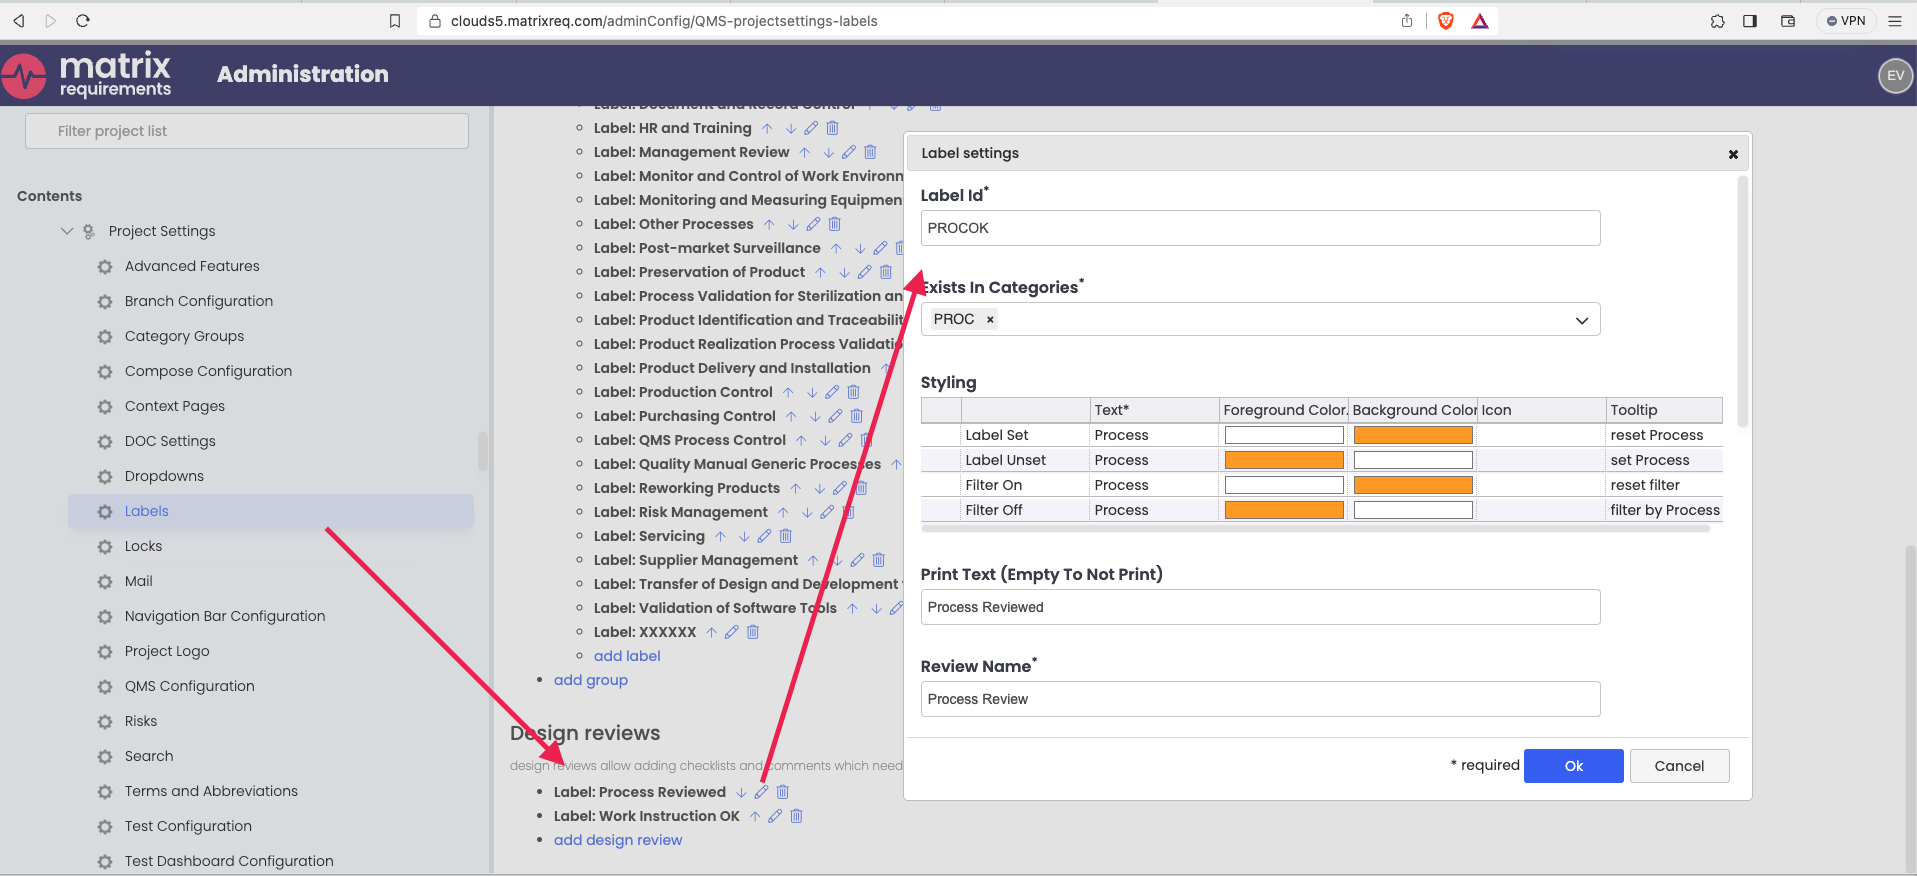
So if you want to use the additional layer of labels, we’ll need the label id before we proceed. The label id can be found in the label configuration of each project. The example below is the standard label configuration of the QMS:
Now that we have all information needed for the configuration, we’ll proceed with the actual plugin configuration.
For this navigate to the Project settings and create a project setting called "automatic_review_settings" by clicking on “add setting” and adding the project setting id.
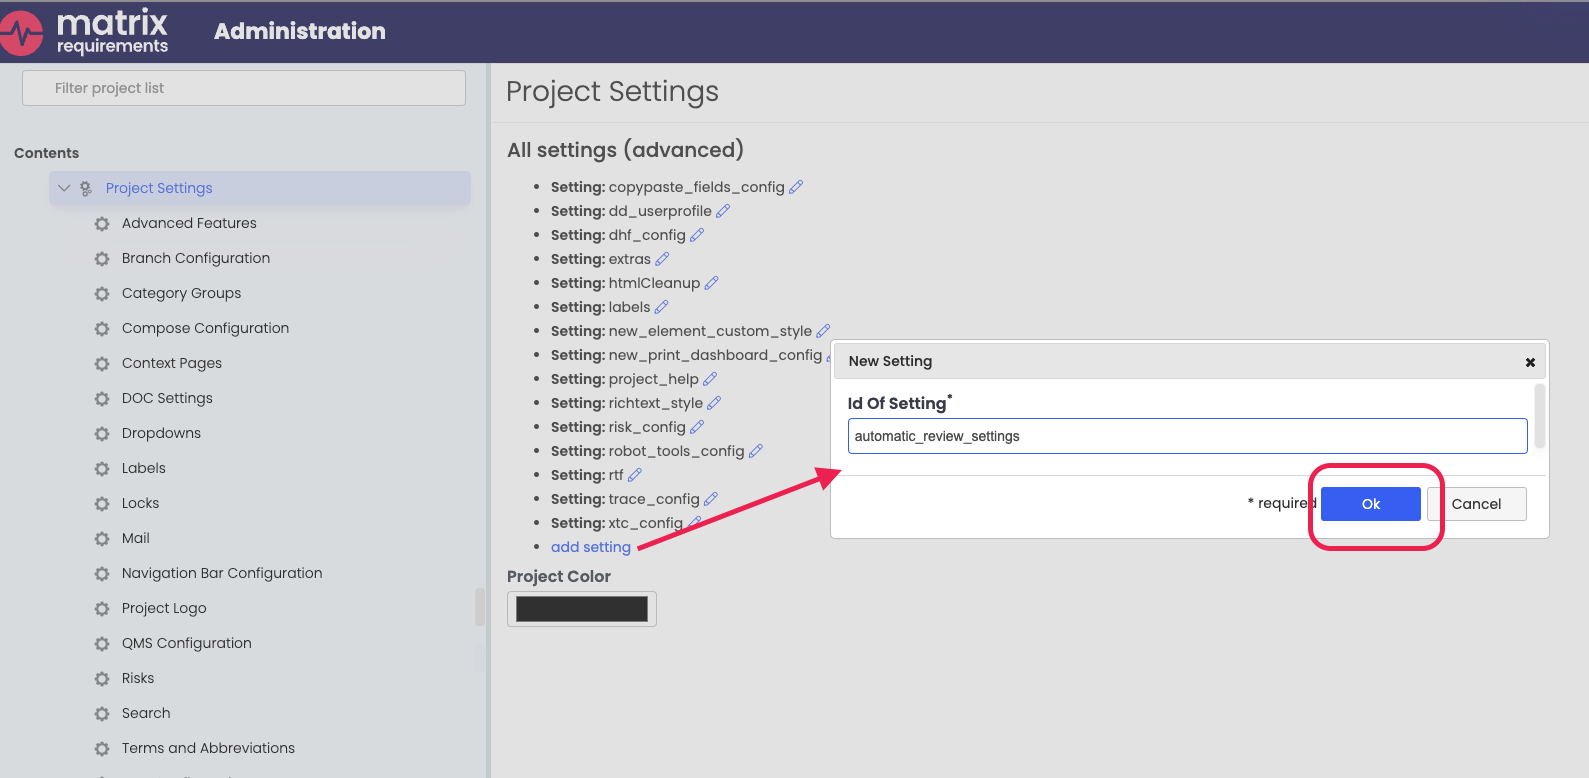
Best to copy and paste as these IDs are case-sensitive.
Once you click ok, a window will pop up to add the custom JSON code snippet based on your configuration. If you already have this snippet ready, then you can paste it right in there, if the snippet is not ready yet, click ok to add the settings and add the custom JSON afterwards, once you read through the rest of this documentation.
To configure the JSON to met your desired functionality you can use the below examples below as guidance. This example is based on a Standard QMS configuration but can be adjusted to match any project configuration:
{
  "settings":[
    {
      "sourceCat":"PROC",
      "targetCat":"REVIEW",
      "usersField":"Reviewers",
      "mrqlFragment":"label!=\"PROCOK\""
    },
    {
      "sourceCat":"PROC",
      "targetCat":"AUDIT",
      "usersField":"Reviewers"
    }]
}
This plugin configuration offers the following setting arrays:
{
    sourceCat:string, /** category where context menu will show to create
                          reviews based on the rule: */
    targetCat:string, /** category where to create reviews */
    usersField:string, /** name of user field is sourceCat */
    mrqlFragment?: string /** optional: search to run */
    menuEntry?:string /** optional: name to show in menu - otherwise make up an entry*/
    newItemName?:string  /** optional: name of items to be created
                            - otherwise make a up a name*/
    newFolderName?:string /** optional: folder to be created
                            - otherwise create in root of target category */
    userGroupFilter?:string[] /** optional: filter users and user groups only
                                  create reviews for the ones in the list */
}
Once you have configured your custom JSON snippet, click one the pen icon next to the recently added project setting and paste it into the box. Once that is done, hit “Ok” and the admin configuration of the Plugin is complete.

To see instructions for how to use this plugin in the UI, have a look at the second part of the instructions.