Set label on Save - Admin Instructions
After downloading the plugin from the marketplace there are several Admin steps that need to be taken care of before effective usage.
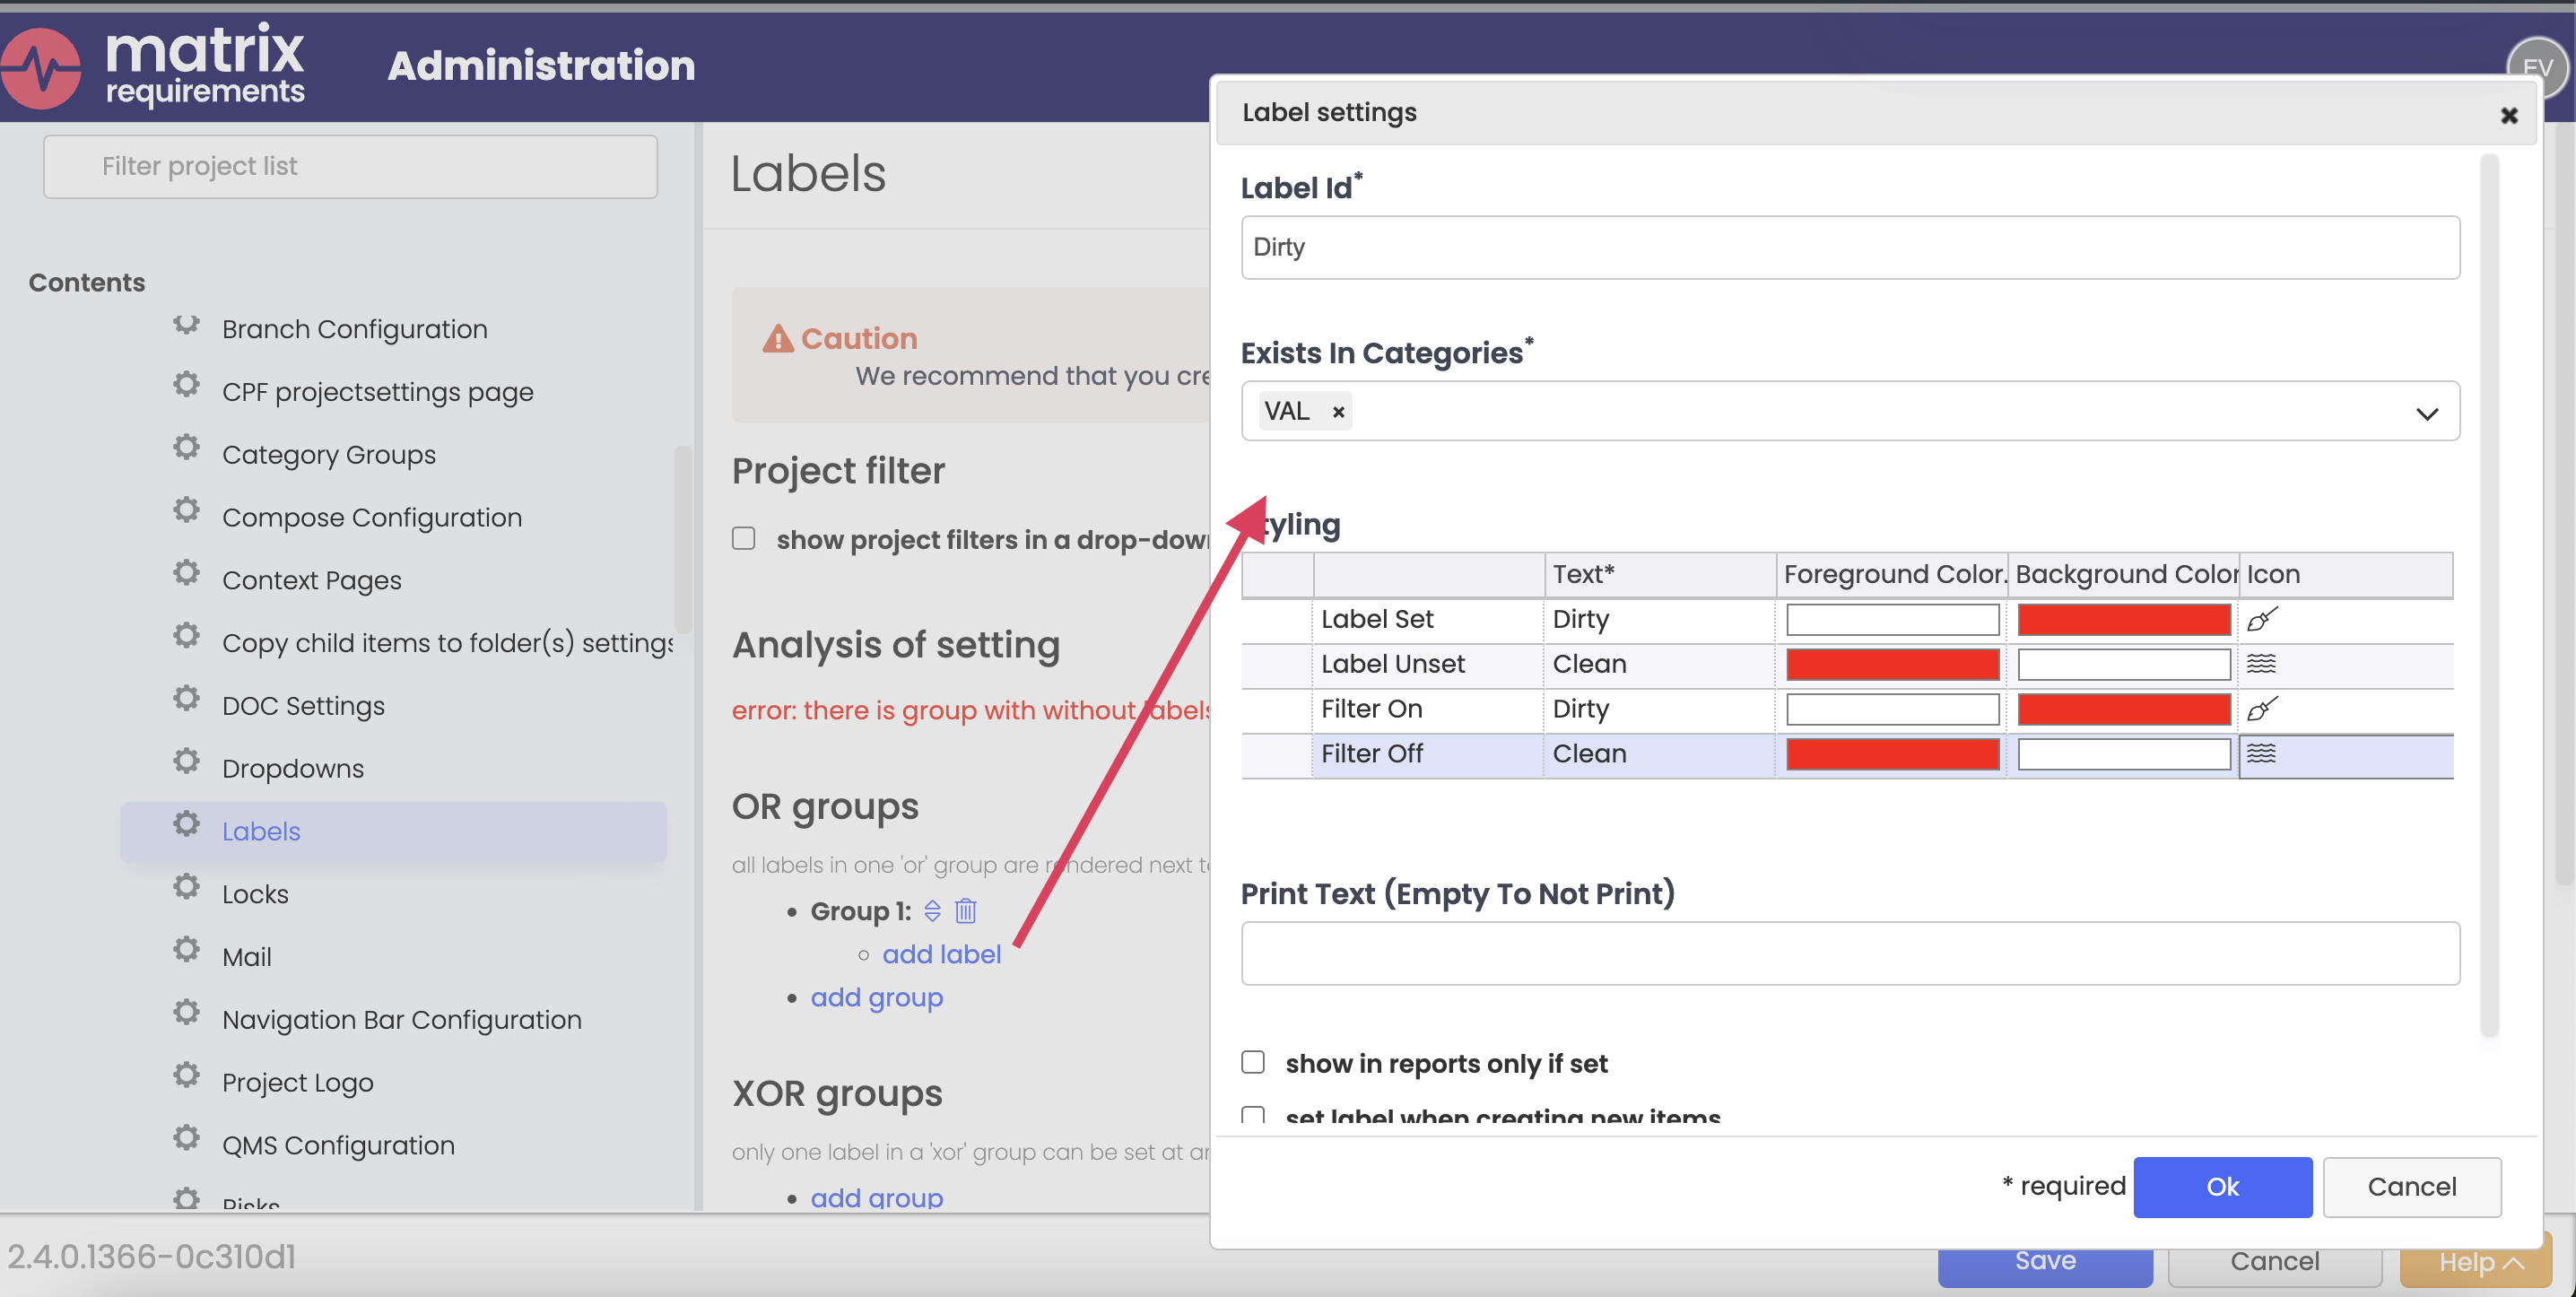
First, as a prerequisite, you will need to define a specific label, that is used to highlight, that an item is outdated and needs revision.
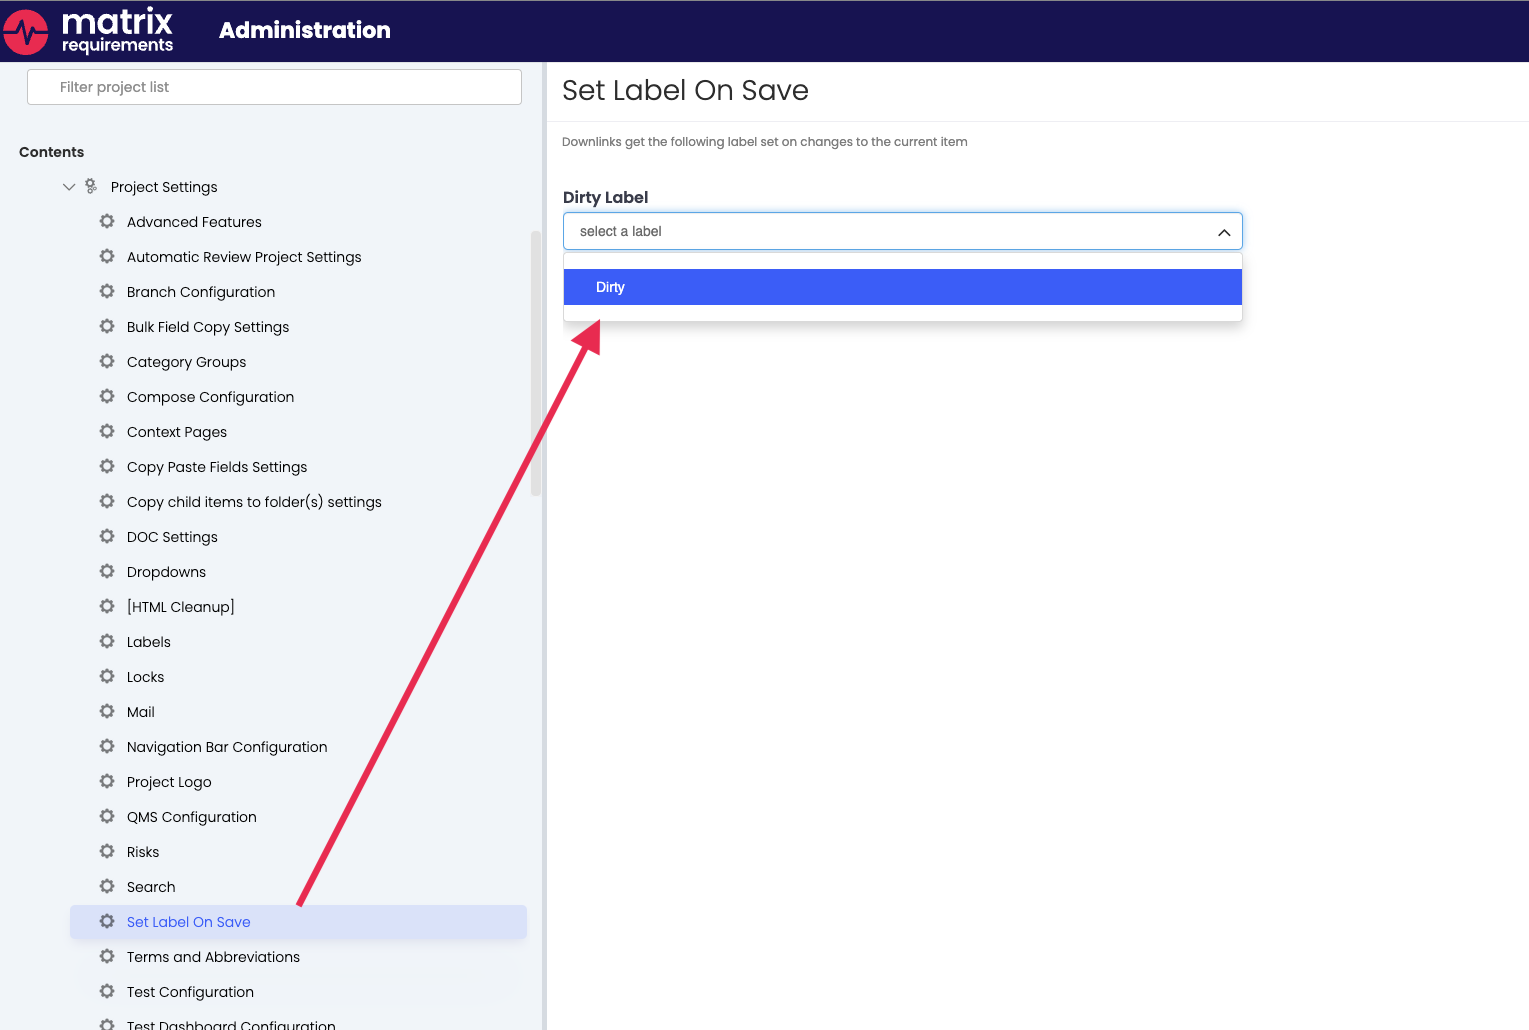
For this we’d recommend the usage of OR labels to keep it simple. Below you can see an example setup for the outdated label, in an homage to one of our founders, we will call it by its initial name, the “Dirty” label, but feel free to configure it to your liking.
Additionally, before you start with configuring the plugin, make sure that the traceability is set up correctly, so the workflow will work as expected.
Once these two steps are completed and you installed the Plugin, then you will see an additional option in the Project Settings menu in the Admin settings, called “Set labels on save”. Click on the new option and select the “dirty” label you previously created in the dropdown for Dirty Labels. Now click save and the Admin part is done.